|
Since Goethe and Chevreul wrote their respective colour theories in the early 19th century, we have all been taught colour theory based upon the concept that red, yellow and blue are the primary colours. Despite the difficulty this caused artists, it has been almost universally accepted by artists. The problem with the old theory when it comes to mixing paints in the real world, it doesn’t work. (Standard theory works with optics, just not with paint pigments.) For instance, in the old theory, red and green are complementary colours. In other words, they are opposite to each other on the old colour wheel. Being opposite to each other, when mixed, theory says, they should cancel each other out. Green should darken red and vice versa. They should mix down to a neutral black. Doesn’t happen. They produce a rather dirty brown. In fact, dirty brown is about all you get when you mix any complementary colours on the old colour wheel. Another thing wrong with the old colour wheel and these three “primaries” is that you cannot mix fundamental colours with them. Try mixing magenta out of the three so-called primaries. You can’t do it. Additionally, you are not supposed to be able to mix anything and produce a primary colour. However, if you mix a pure magenta and a clean, transparent yellow, you can get pure red. What’s going on here? The old theory and the old colour wheel simply don’t work when it comes to mixing pigments. However, there is a replacement for the old wheel that makes colour mixing easy. The new colour wheel has yellow, magenta and cyan as the primaries. These have been used in the printing industry for years. And most scientific papers relating to colour use them as the primary colours for subtractive colour mixing. These produce a far larger group of colours, in a far more predictable manner than the old colour wheel did. Mix cyan and magenta and you will arrive at blue, yellow and cyan for green, and yellow and magenta for red. Mix their complements and you get black. I’ve done my own testing and have read much research done by others like Dan Jasko (He has done a huge amount of testing. His website www.realcolorwheel.com has hundreds of pages of information.). Through all this, I’ve found that the following are the best pigments to use for the three primary colours: Cyan = Phthalo Blue, yellow shade (PB:15.3) Yellow = Hansa Yellow Medium (PY:73) Magenta = Quinacridone Magenta (PR:122) With these three pigments you can mix a wide variety of hues. However, to make mixing easier and quicker, it helps to add four more colours to a working palette: Phthalo Green yellow shade (PG:36) Napthol Red Light (PR:9) Burnt Umber (PBr:7) Indanthrene Blue (PB:60) It’s important to check that the paints you choose use the right pigment. For instance, the right magenta will use pigment PR:122. Some manufacturers will call a colour the same name as another manufacturer, however, they will use a different pigment. Add white to your palette and you have what it takes to create almost any colour. Here’s the basic new colour wheel. 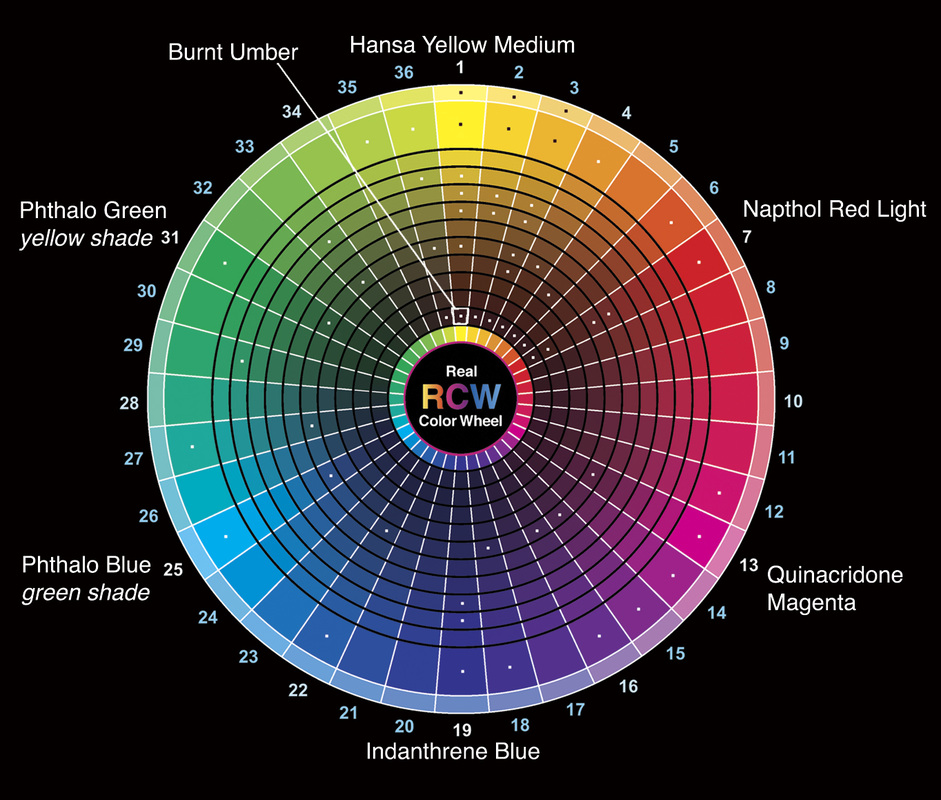 One thing to note, you cannot mix the primary yellow with its compliment and get a dark neutral. Yellow is just too light. However, there is a very handy yellow that is quite dark, and works perfectly, Burnt Umber. Mix Burnt Umber with Indanthrene Blue and you get a fabulous neutral dark. Some artists are afraid of colours like Phthalo Blue, as they are so intense. Their intensity or high Chroma is why they were chosen. The act of mixing colours almost always lowers the Chroma of the resulting colour. You cannot mix two colours to make a richer (higher chroma) colour. Mixes are always duller. So it makes sense to start with the highest Chroma colours for each of the eight colours on our palette. With these eight you can mix down to almost any other colour, but with other colours you can’t mix up to these. For example, you cannot take a Cobalt Blue and mix it 'up' it look like a Phthalo Blue. Another thing you might notice about this palette choice, they are all transparent colours. This is something else few people seem to be teaching, perhaps because they don’t know it. If you mix three opaque colours together, you tend to get mud and you certainly don’t get the richest colours. If you mix a transparent and a translucent colour, you get a near full colour mix. If you mix an opaque with a transparent you get a good mix, even a translucent with an opaque does a better job than two opaque colours. It’s all about the physics of light. Here’s a diagram of what happens (This is an approximation as the reality is too complex to demonstrate in a simple diagram.):  In simple terms, with opaque paint, most of the light bounces around near the surface of the paint layer interacting with the various pigment molecules and exits, as it should, as a mixed colour. This is subtractive mixing. However a fair amount of light simply hits one or the other of the pigment molecules on the top of the paint layer and reflects back at the viewer unmixed (in what is called additive-averaging mixing). This lightens the perceived value of the paint, making it next to impossible to mix really dark colours or neutral blacks.
With transparent pigments, the light passes through the entire depth of the paint layer, bouncing around amongst the pigment molecules and exits again, completely mixed. Very little of the incoming light bounces back from the top of the paint layer, which means that almost all light coming off the paint is full of colour with little reflected, additive-averaging light. This allows for much denser, darker colours, including neutral blacks. This same phenomenon seems to be at the root of the problem of “mud”. When opaque colours are used to mix new colours, as soon as you bring in a third colour, or you use a multiple pigment colour, the odds are stacked against you producing a “clean” colour. With transparent pigments, you have a much wider latitude of mixing choices, which helps you avoid creating mud. I’ve also found that using the new colour wheel to guide in selecting harmonic paintings works as well as the old colour wheel. You can still do complementary, analogous, triadic and all of the other harmonies you used under the old system, just with new colour sets. I haven’t had time to try all harmonic sets, however, those that I have tried seem to work. No limited palette can produce as many colours as are produced by modern paint manufacturers, and certainly not the wide range of colour in nature, however, for those wanting to work with a limited palette that they can learn to control easily, the new colour wheel and its palette are a great place to start. If you want to purchase a colour wheel, the only commercial product I’ve found that comes close to showing the correct relationships is the CMY colour wheel available in some art stores. You can also visit www.realcolorwheel.com and download one of Dan Jasko’s colour wheels. (You have to print it out on high quality photo paper on a good inkjet printer or it won’t be of much use.) I give each of our students the opportunity to purchase one of these colour wheels when they finish one of our workshops or classes. You can find out about classes at www.wilsonstreetstudios.com. I have been using this palette since around 2012. The new colour wheel and palette seems to be catching on beyond a small group of practicing artists, as even the paint manufacturer Golden has come out with a paint set they call “Principal 8 Color Mixing – Modern Theory”. It contains the same set of colours that I have been using, teaching and promoting for a number of years. The only difference is that their Anthraquinone Blue is opaque whereas Indanthrene Blue by Liqutex is transparent. (Known under both names in oil.) Give the modern colour theory a try and you might find it opens new possibilities for your art. Author: Keith Thirgood, Wilson Street Studio, Markham, Ontario. Keith is a Canadian landscape artist whose work is inspired by the post-impressionists, Group of Seven and a number of modern painters. His work can be found at www.wilsonstreetstudios.com. He is also president of the Ontario Plein Air Society (OPAS), www.ontariopleinairsociety.com.
8 Comments
In August, I'm heading out with a number of artists on a plein air painting adventure. We’re taking canoes and paddling into the backcountry of Kawartha Highlands Provincial Park. Which one of you hasn’t had the desire to canoe into the woods, set up your easel and paint just like Tom Thomson, AY Jackson and the rest of the Group of Seven did 100 years ago as they first ventured into the backwaters of Algonquin Park? Here's your chance to paint en plein air the way Canadians first did it, rather than in the gentle fields of Provence, the way the Europeans had been doing. 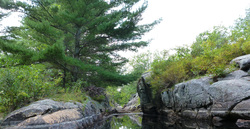 Our adventure begins when we all meet at the Long Lake entrance to Kawartha Highlands and load our canoes. I supply the canoes, life jackets and basic safety kit and each artist supplies their own camping kit. (I can help individual artists rent or purchase various pieces of equipment if they don’t have their own.) I'm an experienced camper and canoeist, and am available to help less experienced artists deal with the backwoods. 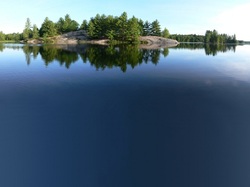 We paddle a couple of kilometres down Long Lake until we reach the Buzzard Lake portage. We take the 300 metre portage to Buzzard Lake and then continue paddling until we reach our campsite. That evening, after supper, we have a discussion on plein air painting, composition and what we all hope to gain out of the retreat. The next morning, after we each prepare our breakfast and lunch for the day, we head off in our canoes to the first painting location. Some of us will paint from our canoes; others will set up on land. 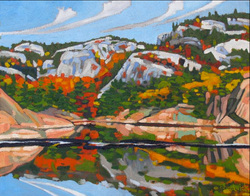 The first morning I will lead a colour mixing exercise where you will become familiar with the reduced modern palette I've recommended.
I will help each artist with subject selection, finding the order out of the chaos of a “real scene” and how to capture the essence of a scene in a few deft strokes. Each day brings new scenes to capture and new lessons to absorb. Learning, adventure, camaraderie. A perfect four-day outing for the adventurous artist. If you want to be one of those artists, visit this page on our website for more information. We've often been asked what an artist should to bring when going plein air painting. Not that easy to say, as we are all so different, however, I can say what I bring. (This is for acrylic painting.)
First, you need to control your selection of paint. Depending upon how far I expect to walk with my kit, I bring either a bare minimum palette of colours, or a slightly expanded set. Bare minimum set Hansa Yellow Medium Napthol Red Light Quinacridone Magenta Burnt Umber Indanthrene Blue Titanium White Expanded set Hansa Yellow Medium Napthol Red Light Quinacridone Magenta Burnt Umber Indanthrene Blue Phthalo Blue (green shade) Phthalo Green (yellow shade) Titanium White Polymer medium With either of these two paint kits, you can mix almost any colour you come across. Two brushes: Catalyst by Princeton Polytip bristle 1" & 1/2" Brights (great brushes for plein air, if you like stiff, easy to control brushes) Palette: Non-stick baking tray Field easel (I have my own custom-made easel) or pochade box with tripod Yoghurt tub for cleaning brushes Rags for cleaning brushes Viewfinder Small sketchbook 1 soft pencil Eraser Grey-scale markers: black, medium and light non-bleed markers 1 small spritzer bottle for keeping the paint on the palette open Clamp-on umbrella to shade painting board and palette 3-4, 12x16 (or whichever size you like to work with) painting boards for the day, already primed orange or black Stool (If you paint sitting down) Backpack large enough to carry all of the above except the boards, which I carry in a board holder Water for painting, if you will not be near a water source Camera to shoot scene and capture progress of your painting Non-Painting Items Sun hat Sunscreen Insect repellant Drinking water Snacks Sweater or similar in case it turns cool Rain gear if there's chance of rain Pliers, for opening stuck paint tubes Good walking shoes Cell phone for emergencies If you are going deep off the regular track, these other items are good to have as well Compass and/or GPS Food & more water Whistle for signalling Basic first aid kit Walking pole Map of area Space blanket |
Keith ThirgoodIs an artist working in the Canadian, post impressionist style. I paint en plein air when I can and in the studio the rest of the time. Archives
June 2019
Categories
All
|
 RSS Feed
