|
In August, I'm heading out with a number of artists on a plein air painting adventure. We’re taking canoes and paddling into the backcountry of Kawartha Highlands Provincial Park. Which one of you hasn’t had the desire to canoe into the woods, set up your easel and paint just like Tom Thomson, AY Jackson and the rest of the Group of Seven did 100 years ago as they first ventured into the backwaters of Algonquin Park? Here's your chance to paint en plein air the way Canadians first did it, rather than in the gentle fields of Provence, the way the Europeans had been doing. 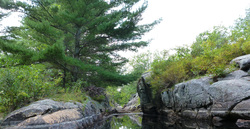 Our adventure begins when we all meet at the Long Lake entrance to Kawartha Highlands and load our canoes. I supply the canoes, life jackets and basic safety kit and each artist supplies their own camping kit. (I can help individual artists rent or purchase various pieces of equipment if they don’t have their own.) I'm an experienced camper and canoeist, and am available to help less experienced artists deal with the backwoods. 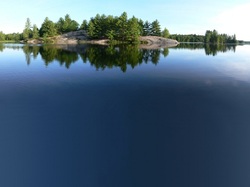 We paddle a couple of kilometres down Long Lake until we reach the Buzzard Lake portage. We take the 300 metre portage to Buzzard Lake and then continue paddling until we reach our campsite. That evening, after supper, we have a discussion on plein air painting, composition and what we all hope to gain out of the retreat. The next morning, after we each prepare our breakfast and lunch for the day, we head off in our canoes to the first painting location. Some of us will paint from our canoes; others will set up on land. 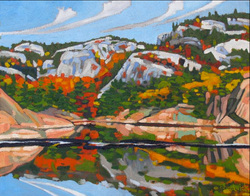 The first morning I will lead a colour mixing exercise where you will become familiar with the reduced modern palette I've recommended.
I will help each artist with subject selection, finding the order out of the chaos of a “real scene” and how to capture the essence of a scene in a few deft strokes. Each day brings new scenes to capture and new lessons to absorb. Learning, adventure, camaraderie. A perfect four-day outing for the adventurous artist. If you want to be one of those artists, visit this page on our website for more information.
1 Comment
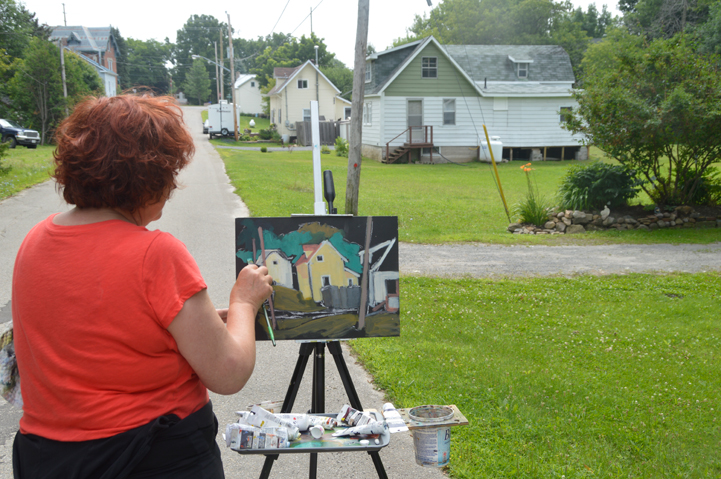
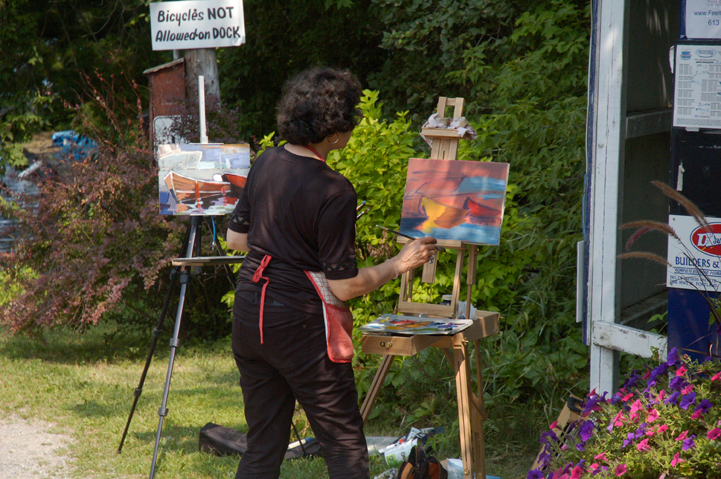
Our students enjoyed themselves in Newboro, Portland and Westport, Ontario. Painting up a storm. Helen here. I like to keep a journal when we go on trips. As this was an exploratory trip in preparation for our Kawartha Highlands Art Retreat, it was even more important. We drive northeast from Markham. It’s only a couple of hours, not so far compared to many of our retreat destinations. We make a left onto Long Lake Road down to Long Lake Lodge. Here we pick up our rented canoe and begin to load our supplies and kit for the painting trip. This is the same place we will be meeting the participating artists in our August 6 through 10 art retreat. 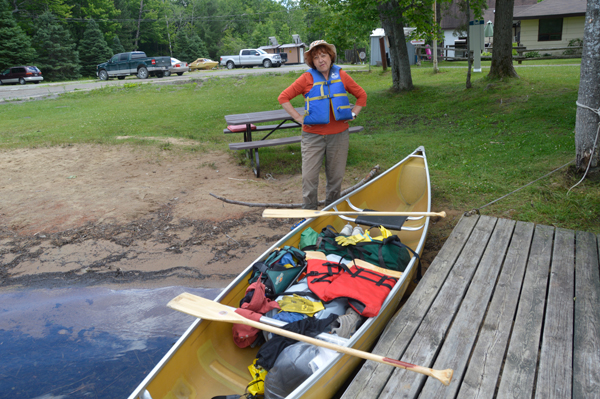
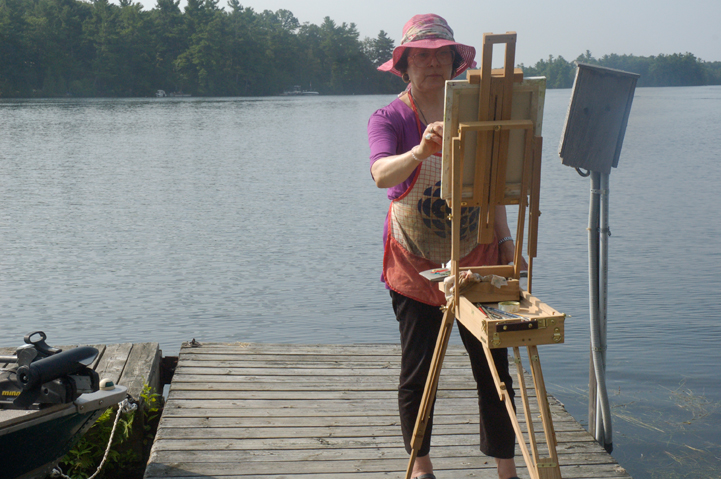
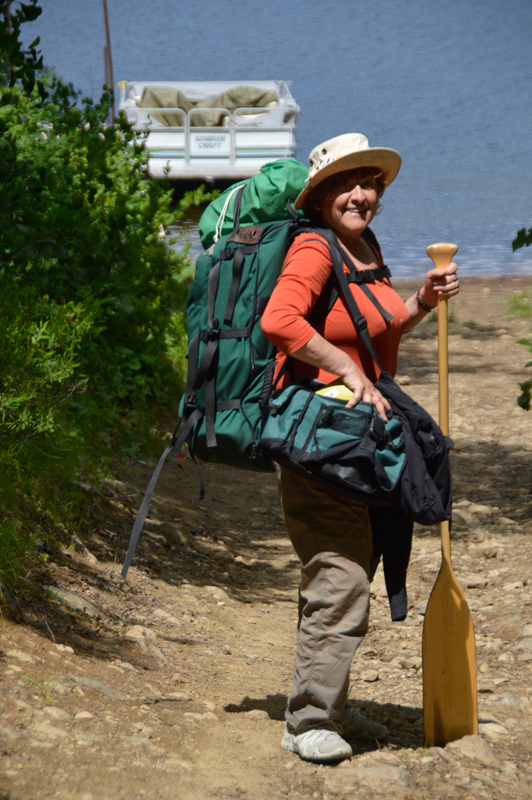
Helen at launch site. Canoe packed and ready to go.
Once our packs are in, we push off and begin paddling west along this stunning lake. Rocks rise massively on one side and islands dot the surface. It takes us just over an hour, going at a leisurely rate to make it to the portage to Buzzard Lake. 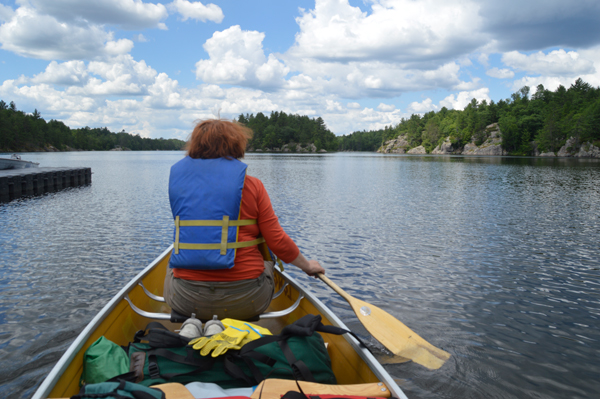
Pushing off onto Long Lake, Kawartha Highlands Provincial Park.
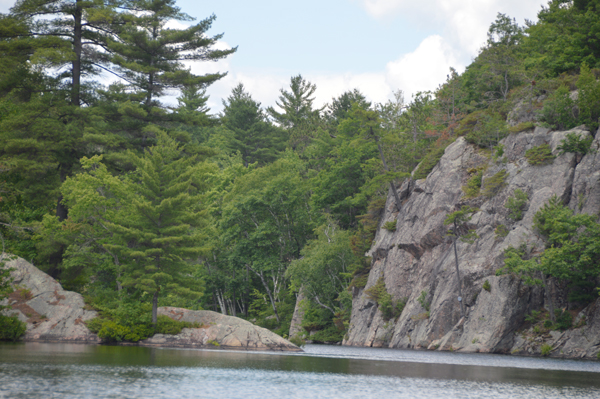
Fantastic cliffs
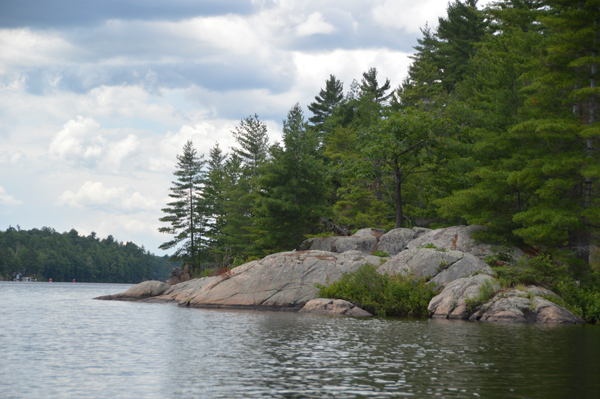
Great places to paint already.
Along the 340 metre portage between Long and Buzzard lakes we meet Bonnie and Doug who are kayaking. They’re from Pickering, but teach music in Markham. They helped us lift our canoe onto Keith’s shoulders and he carries it, over his head, over the length of the portage. It’s only 10 minutes in each direction; we go back and forth twice, (plus the extra time we took chatting [resting] with the teachers.) Compared to Algonquin portages, this one is smooth and easy going.
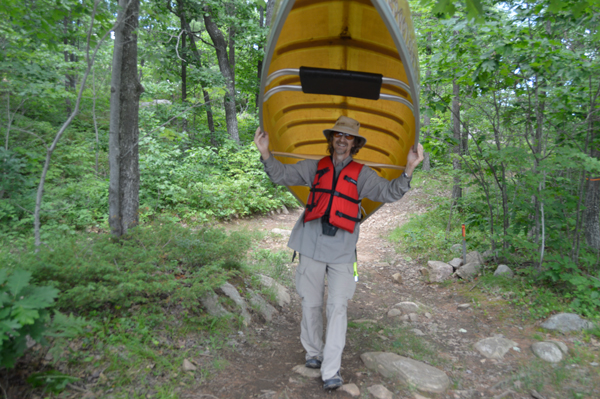
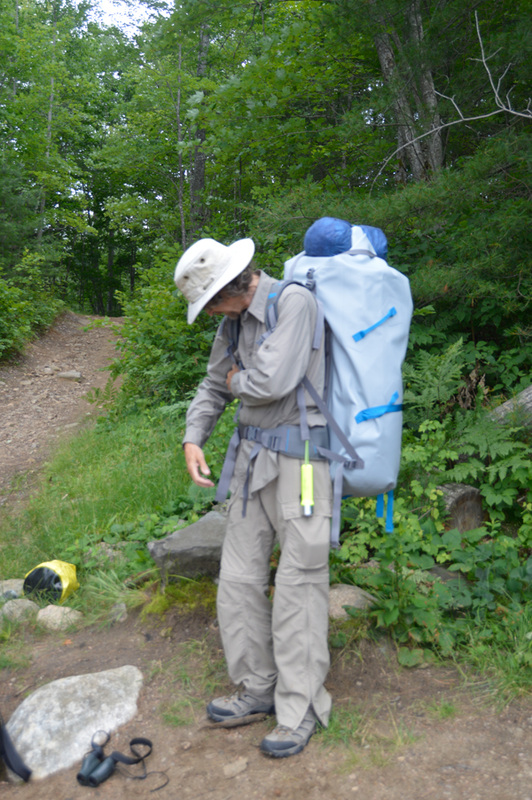
Keith portaging canoe.
Also, compared to Algonquin, the scenery here is more spectacular for the most part. Algonquin tends to be green on green. Here there are so many lovely rock faces, it totally transforms the scenery. 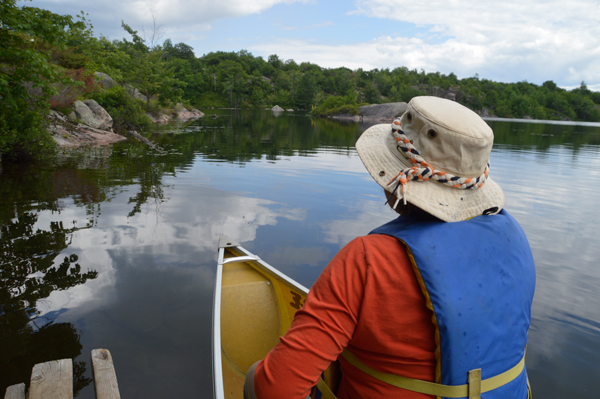
Heading off onto Buzzard Lake.
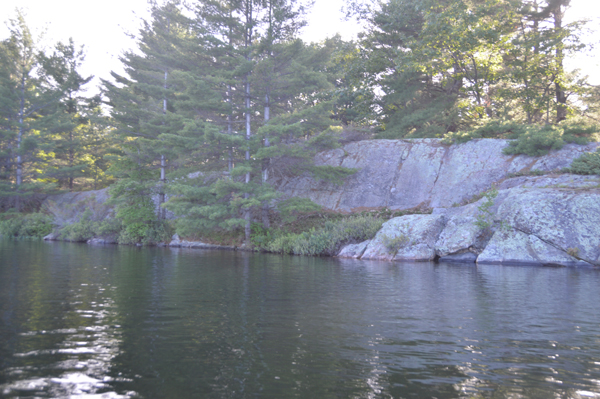
More great scenery.
By 4 pm we arrive at our campsite on Buzzard Lake. It was fairly simple to get our canoe up onto dry land and start to unload. Our two-man tent is new (they’re lighter and cleverer these days) so Keith is spending a few minutes going over instructions. Sometimes it seems the odd shapes make no sense, but it comes together like some magical plan. Meanwhile, until he needs me, I’m unpacking the food and medication. It may be a campsite, but there’s a homey aspect to the organization. I doubt A.Y. Jackson lived like this in his month-long stay in a tent after the Indian guide dropped him off. I had this image of roughing it, but this is mighty civilized. 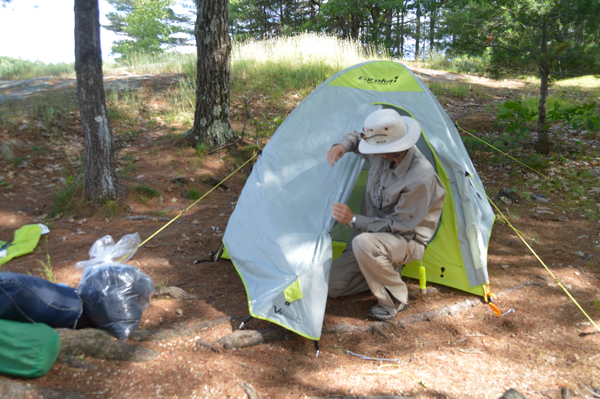
Keith setting up new tent.
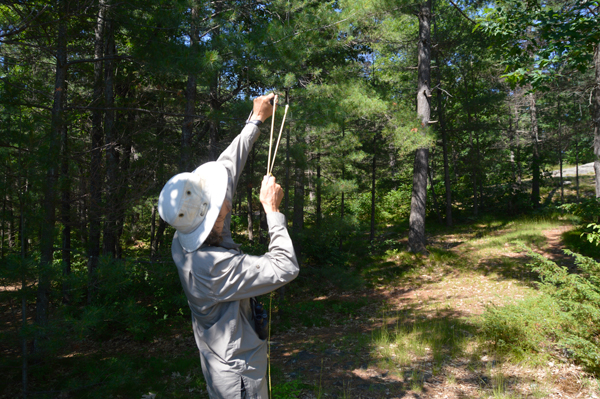
Keith using his slingshot to get a rope high into the trees.
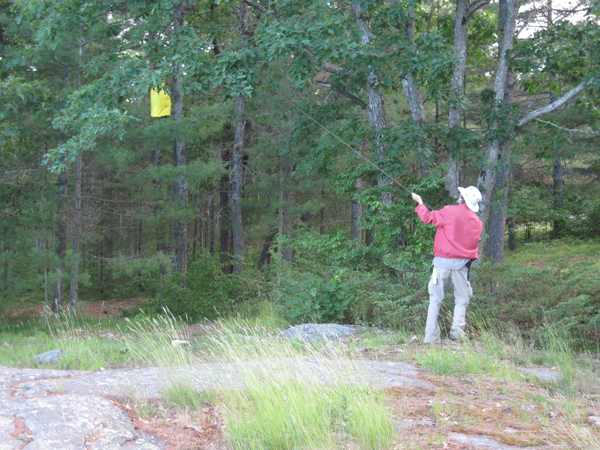
Hauling the food up into the trees.
By 5:40 we’re eating cheesy noodles, pre-roasted chicken slices, and a salad of cherry tomatoes and cucumber slices. Good to have some fresh food at the start. Keith did a lot of research and shopping before we started this trip, so we have, among other things, triangular-shaped nesting bowls (outer for entrees, inner ones, insulation-lined and lidded, for tea.) Remind me to bring instant coffee next time. Even the instant variety is better than none at all. The instant skim milk tastes better than it used to. Dessert is herbal tea, chocolate wafers and trail mix. 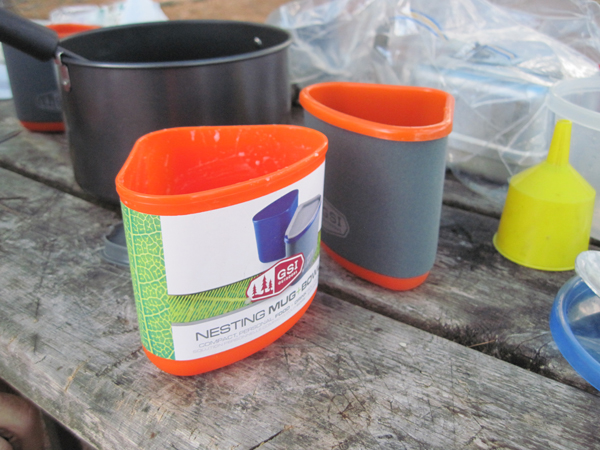
Clever nestling cups and bowls.
Earlier, as we paddled, and now, sorting things out at the site, we’re treated to squalls of rain – nothing that lasts long enough to cause concern. The sky is mostly patches of blue. The lake water is warm (I know because I’m washing dishes in it). 6:30, dinner is finished. Dishes done and hanging in the net. Food hung up in a tree. The sun is still up, and there’s time to paddle around and see what we can find for subject matter. What we find are more potential scenes than we could possibly paint if we had two weeks to do so. 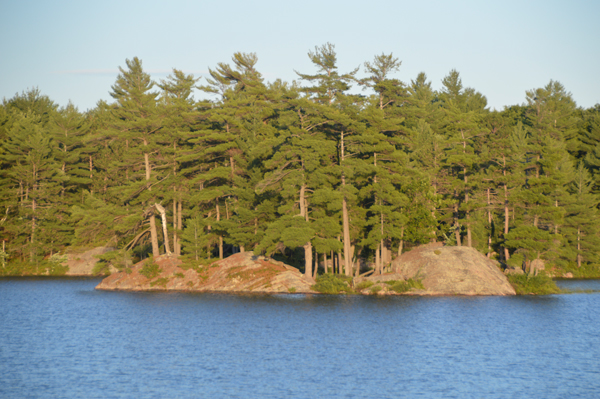
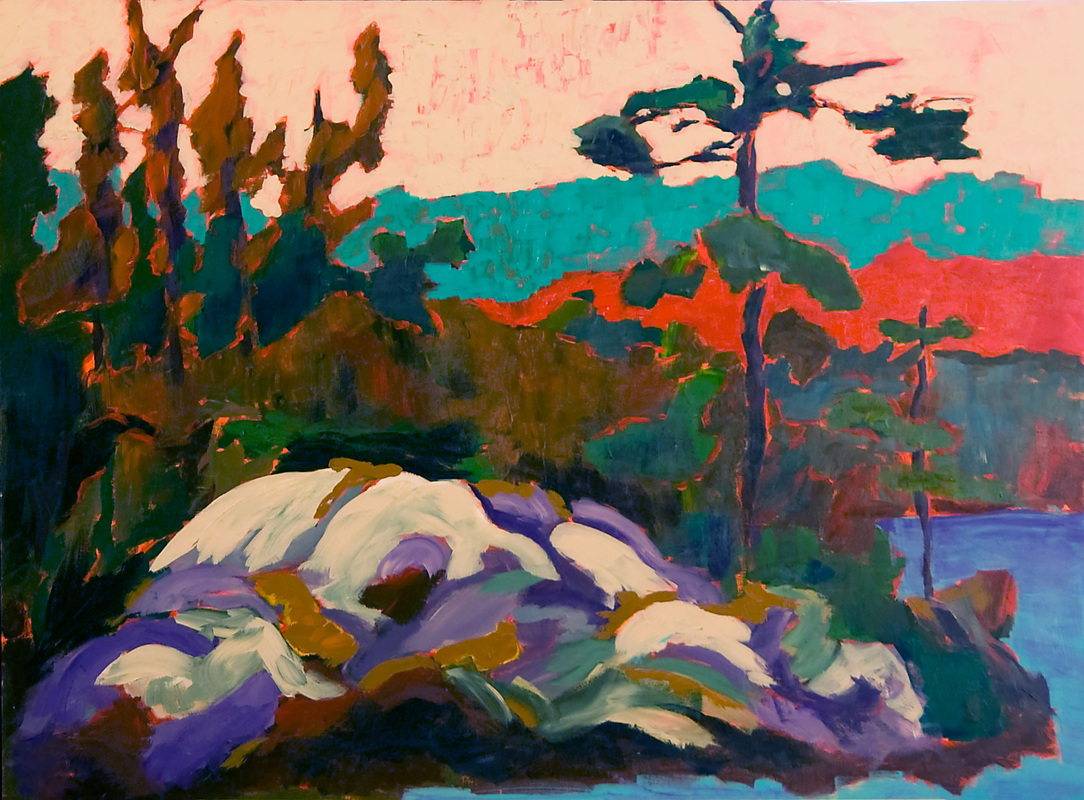
More painting potential.
9:00 pm, not really dark, however, time to build a fire. This one, to Keith’s chagrin, took him 4 matches. The wood was dampish, but it’s done and he’s now carving he’s a walking stick as the fire roars. Fire. Loons. So Ontario. 9:50, crawling into sleeping bags in the tent. Ziploc bags are godsends. They keep things together, dry, you can see everything and they float. I’ve just had an idea, I’m going to plan ahead for next time and pre-measure all of our containers and tools. Pots, mugs, ladle, etc. What holds a tablespoon, a cup, quarter cups, etc. This means I don’t have to lug around extra items for measuring. 9:00 am. No rising at the crack of dawn for this pair. We were both too baffed. Breakfast is cereal with skim milk. Lunch will be freshly scrambled eggs and pre-cooked bacon wrapped in a pita. Eggs in shell are nature’s perfect packaging. Kept them in a stiff plastic container. Loons are yodeling, Keith is washing dishes, this is perfect. Finding our toothbrushes in with the art supplies is pretty terrific (thank goodness!). Now we’re off to find some more places to paint. 11:00am and we’re on an island, set to paint another island that has magnificent boulders and Casson-like pines. A.J. would have painted this if he’d seen it. Everywhere we turn, another potential painting confronts us. When we come back in August for the full retreat, we’ll have more time to try out the many possibilities. 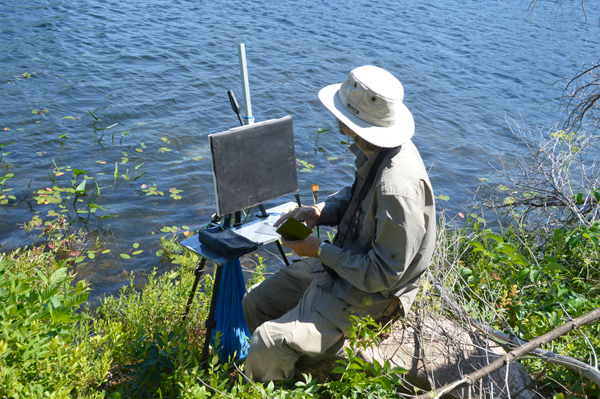
Keith sitting on a rock at water's edge, ready to paint.
Five young guys are taking turns jumping off two levels of a nearby cliff. Their cries of trepidation and triumph are infectious. This is what northern lakes are for – and painting. We watch a big ant with a piece of scrambled egg three-times his size racing off with his prize. We finish our paintings and then we’re off, exploring the rest of the lake. 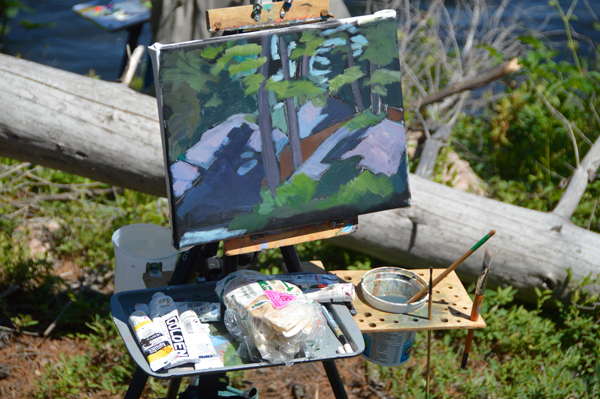
My first painting of the day.
Keith half way through his first painting of the day.
At one end of the lake we see this weird illusion of the water ending in mid air. Closer inspection shows it to be a log jam where the water seeps through to a rocky, river bed. We had to get down there. Risking twisted ankles and who knows what else. 
The lake falls off the edge.
Keith is very agile. I am much less so. But we are both attracted to rocky places, it seems. So, not much smarter than teen-age boys, we descend into the rocks and moss and broken branches in the dimly lit woods. Lived to tell the tale. 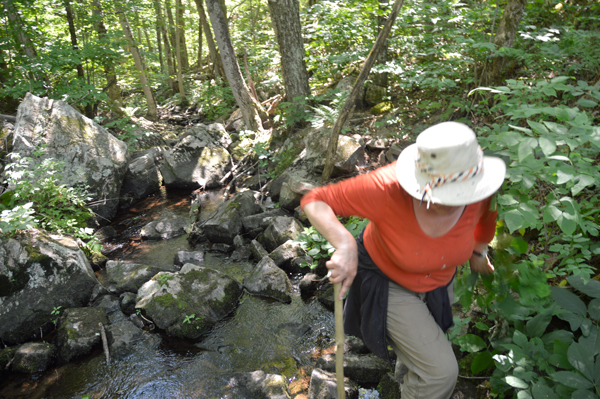
Helen scrambling deep in the rocky gully.
Swamps are equally seductive. But mosquitoes live there, and we’re not that intrepid. Back at the camp, near the tent, there’s a small woodpile. From it, weird grunting sounds come in fairly regular intervals. Good thing we don’t watch spooky movies. Eventually, Keith figured it out. Grubs. They chew the wood very loudly. I’m the cook, but Keith is the kitchen magician, keeping stoves lit, pots boiling and the fire roaring. Once a boy scout, always a boy scout. I was going to make couscous, but forgot the oil. So it’s Sierra Chicken in a foil bag. Edible. However, regular ramen soups are better and cheaper. We had figured out our portage weight allotment and from that I figured out what we could carry in the way of food. Two things we realized: We can carry more, split into two bags. Not such a big deal doing the portage. It’s a short one and it doesn’t take long once we’re paddling again to get to the site, so timing is not frantic. And, two, I way over estimated how much we’d be eating. Second morning. Our last day. Must leave camp by 10am if we’re to make it back by 4 or 5 pm tonight. This time, up early. Took longer to pack than expected. Suddenly there’s a shift in the light and we see whole new painting possibilities present themselves. While Keith considers the re-packing of the tent (very different exercise from unpacking), I grab a quick sketch. Then it’s serious packing and into the canoe and off again. 
The light changes and another potential painting appears.
The portage back was interesting in that we met two park wardens. They help us by pointing out where the local waterfalls are. 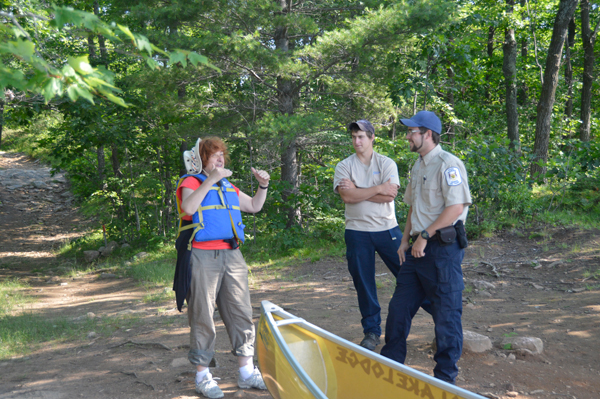
Helen and the two park wardens.
On the longer paddle down Long Lake, the wind whipped up the water suddenly. Paddling got a bit more challenging. In spite of that, we made it back in record time and before we knew it, we were on the road (12:10), driving home in gorgeous weather, taking the side roads, wanting to be home again but not just too soon. Our conclusion: Kawarth Highlands Provincial Park is a great destination for plein air painters, especially those from south/west Ontario and from the GTA. It’ a fraction of the distance compared to Algonquin. Algonquin has the history and romance, Kawartha Highlands has proximity, accessibility and scenery. And we conclude that even with painting supplies adding to the weight, it’s not too hard and new canoeists and new painters will have a good time trying out Kawartha Highlands Provincial Park. 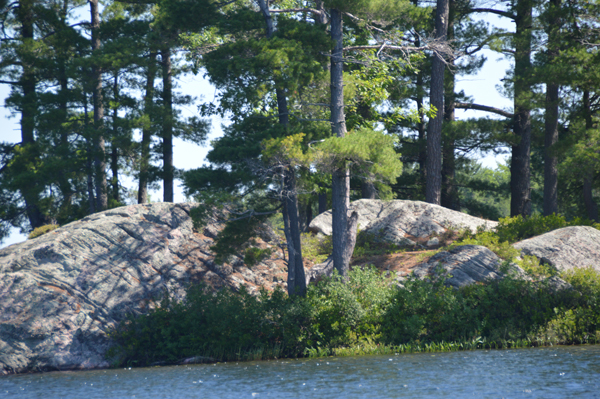
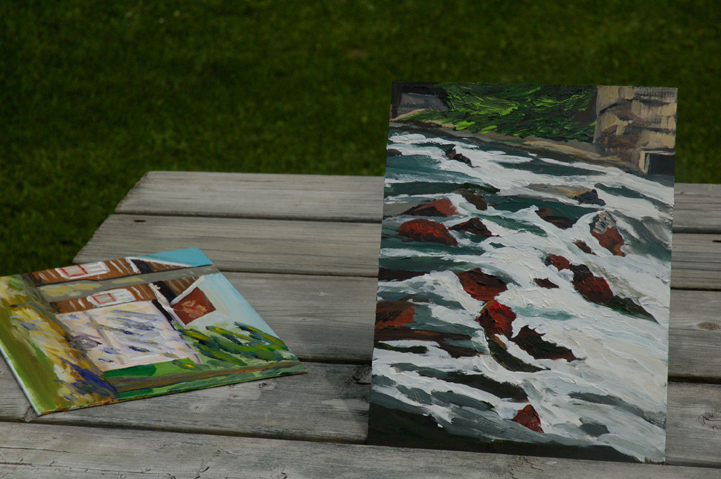
Another painting ready to be painted.
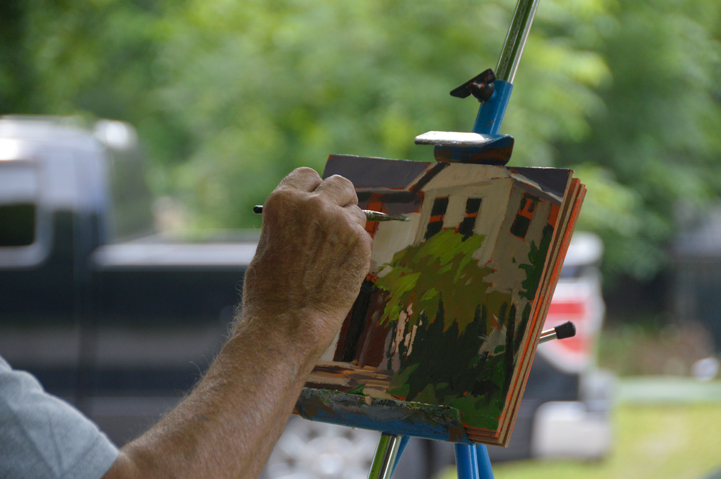
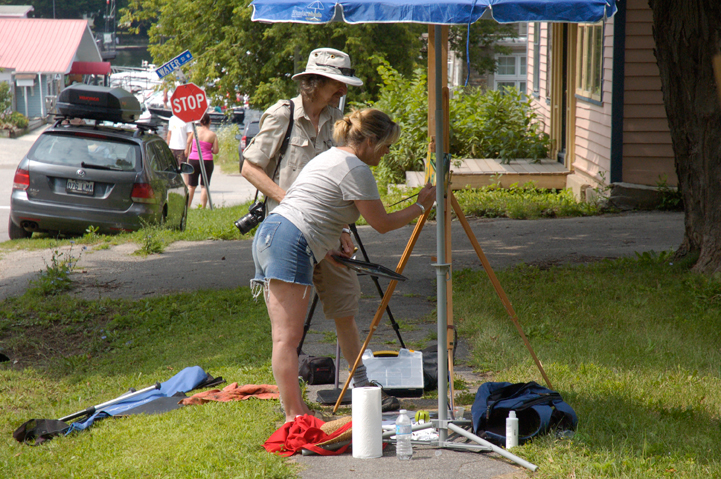
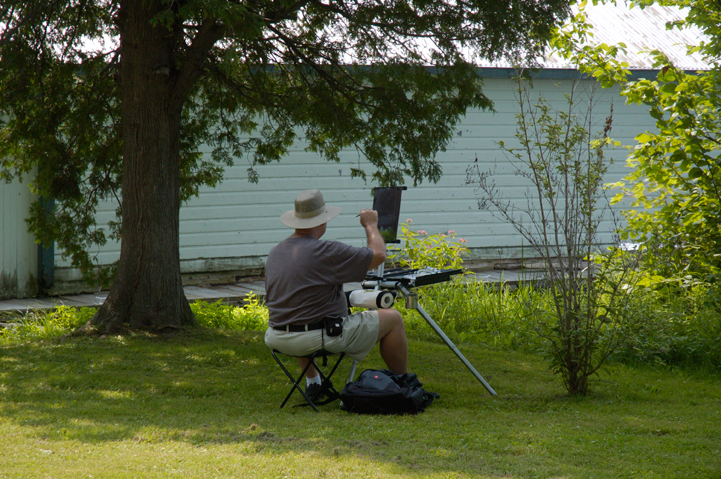
A number of artists have asked us where we got our special, plein air easel set up. When I tell them that I built it, they all want to see plans. To respond to all those requests, I've put together a PDF, which goes through all the steps or building your own field easel.  This easel requires some basic woodworking and metalworking skills, however, nothing advanced.
You need to be able to measure, saw wood and metal, drill, file and glue with epoxy. The most complicated thing is tapping threads. This easel works for both oil and acrylic set ups. The instructions are for the acrylic set up. To modify the set up for oil, you don't bother to use the magnets, as your palette will not be metal, and you adjust the length of the hold-down clip to suit your preferred palette. Also, you need to adjust the large opening in the brush and cleaner flap to fit whatever liquid holder you use. Click here to download a PDF (2 MB) that has complete instructions to build this set up. Click here to download a PDF that shows the oil solvent cup holder modification. We've often been asked what an artist should to bring when going plein air painting. Not that easy to say, as we are all so different, however, I can say what I bring. (This is for acrylic painting.)
First, you need to control your selection of paint. Depending upon how far I expect to walk with my kit, I bring either a bare minimum palette of colours, or a slightly expanded set. Bare minimum set Hansa Yellow Medium Napthol Red Light Quinacridone Magenta Burnt Umber Indanthrene Blue Titanium White Expanded set Hansa Yellow Medium Napthol Red Light Quinacridone Magenta Burnt Umber Indanthrene Blue Phthalo Blue (green shade) Phthalo Green (yellow shade) Titanium White Polymer medium With either of these two paint kits, you can mix almost any colour you come across. Two brushes: Catalyst by Princeton Polytip bristle 1" & 1/2" Brights (great brushes for plein air, if you like stiff, easy to control brushes) Palette: Non-stick baking tray Field easel (I have my own custom-made easel) or pochade box with tripod Yoghurt tub for cleaning brushes Rags for cleaning brushes Viewfinder Small sketchbook 1 soft pencil Eraser Grey-scale markers: black, medium and light non-bleed markers 1 small spritzer bottle for keeping the paint on the palette open Clamp-on umbrella to shade painting board and palette 3-4, 12x16 (or whichever size you like to work with) painting boards for the day, already primed orange or black Stool (If you paint sitting down) Backpack large enough to carry all of the above except the boards, which I carry in a board holder Water for painting, if you will not be near a water source Camera to shoot scene and capture progress of your painting Non-Painting Items Sun hat Sunscreen Insect repellant Drinking water Snacks Sweater or similar in case it turns cool Rain gear if there's chance of rain Pliers, for opening stuck paint tubes Good walking shoes Cell phone for emergencies If you are going deep off the regular track, these other items are good to have as well Compass and/or GPS Food & more water Whistle for signalling Basic first aid kit Walking pole Map of area Space blanket  The following are ten steps I encourage all of our students to consider as they paint.
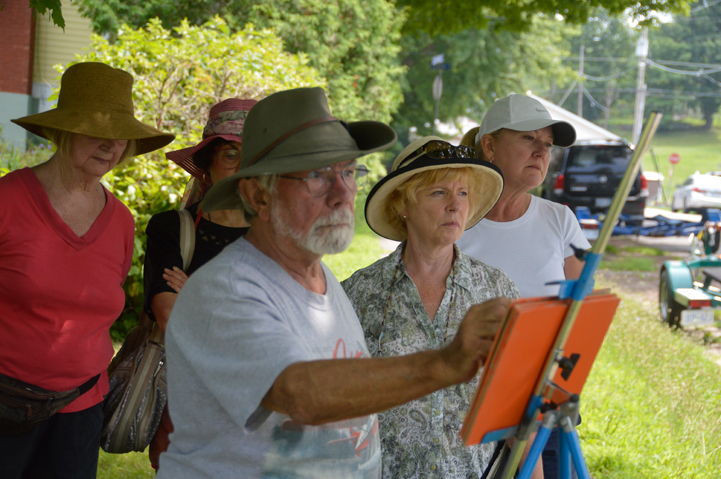
Cheers, Keith Thirgood www.wilsonstreetstudios.com After working with new plein air painters over the past couple of years I've found the following tips to be helpful. Bringing order out of chaos Painting out of doors can be overwhelming. There is just too much "stuff" in front of you to make a good painting. Your first job is to simplify by eliminating all extraneous details and items.
 This is a shot of a typical scene. 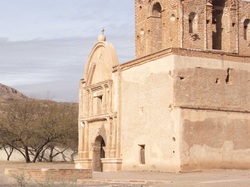 This is a crop of the same scene focusing on a focal point. 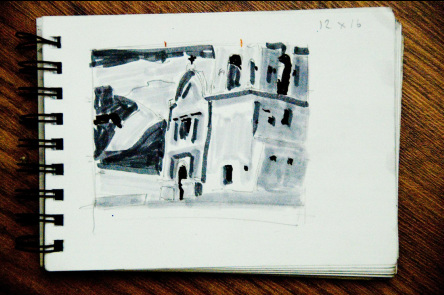 Here is a thumbnail sketch of the scene. I decided I wanted the mountain to show up in the scene so i moved it right. I also wanted more of the tower to show, so I shortened it.  This is the final plein air painting.
Keith here today. I'm writing this from the deck of the luxury cottage we rented to run our Muskoka Art Retreat. The students have finished their three days and have gone home with their new paintings. I'm looking over the small sketches I did over the past few days and am thinking about large canvases. Once in a while one of our small works simply calls out to be enlarged. When it does, we take off our plein air hats and move into the studio, pull out a big surface and give it a go. I've done quite a few big versions of smaller works and have come up with a few "rules" to guide me:
11 x 14 to 24 x 36 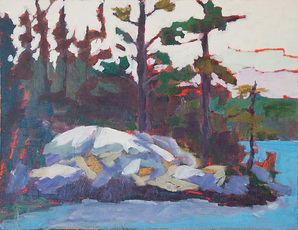
As you can see, I kicked up the colour, eliminated objects, added more power to the sky and tried to recreate the feeling I had looking at this slice of the Canadian landscape. In the following pair, I wanted to take my already somewhat loose painting and take it to an almost abstract vision. 12 x 16 to 30 x 40 

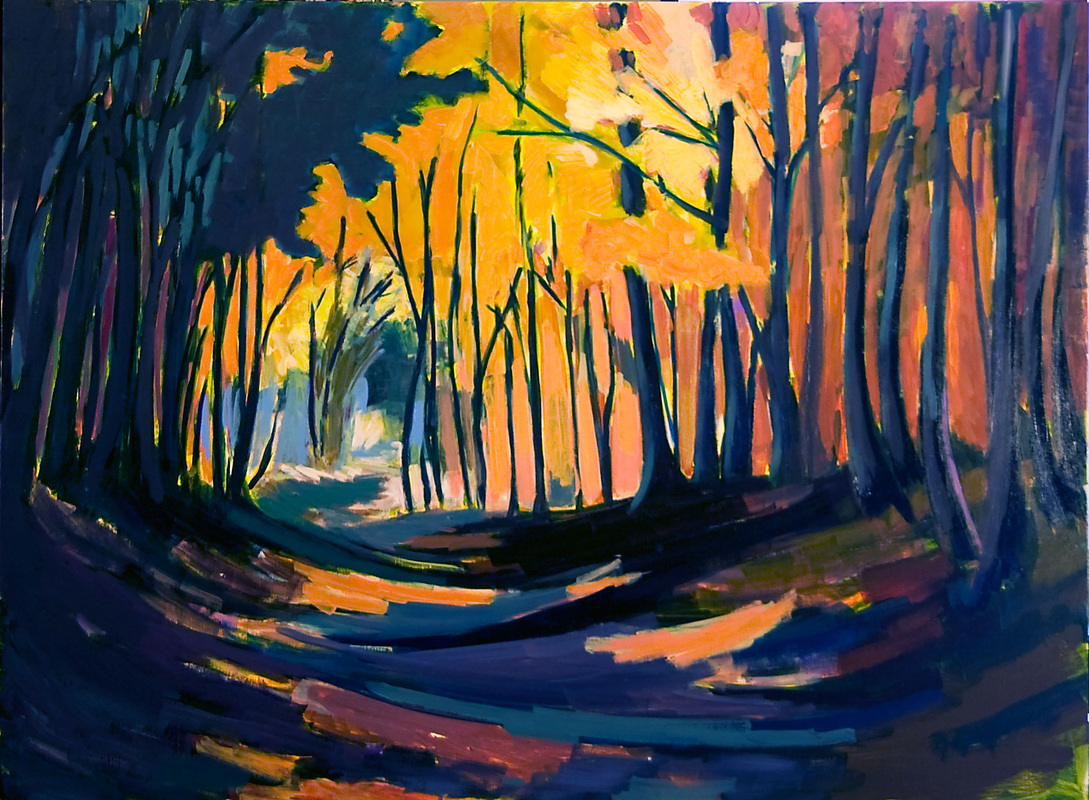
The next two paintings are by Helen. She felt she cropped the original scene too tightly and lost some of the drama of the path in the woods, so from memory and her original painting, she "backed up" and created a deeper version with more vivid colours. She tells me it's a work in progress. 12 x 16 to 30 x 40 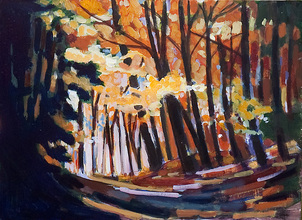
I don't always explore new ground with a painting. In the following case, a number of people asked me to paint a larger version of the original sketch, which I did, without trying for anything new. It was accepted into the Quest Spring Juried show and subsequently sold. Similar, but different. 12 x 16 to 16 x 20 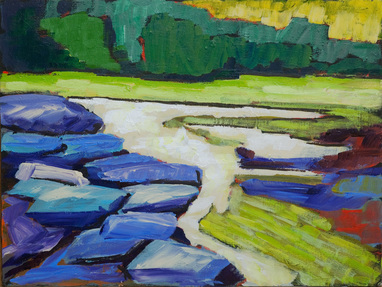
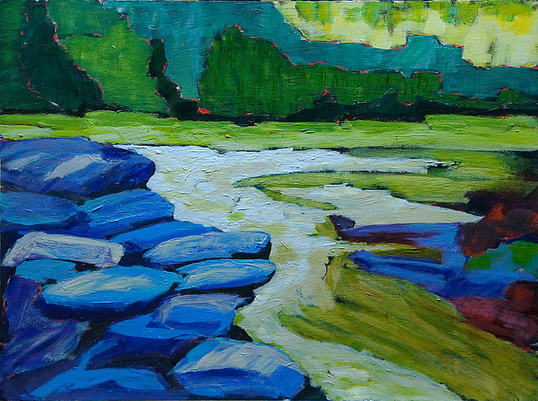
Just for fun, I also painted a scaled down version. 12 x 16 to 8 x 10 
I hope these "rules" help you in your next enlargement project. Have you enlarged any of your smaller paintings? Do you have any insights you can share?
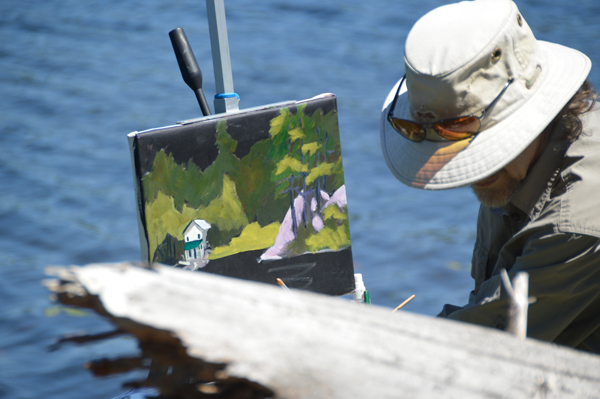
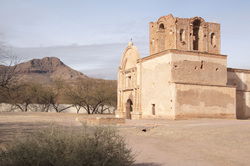
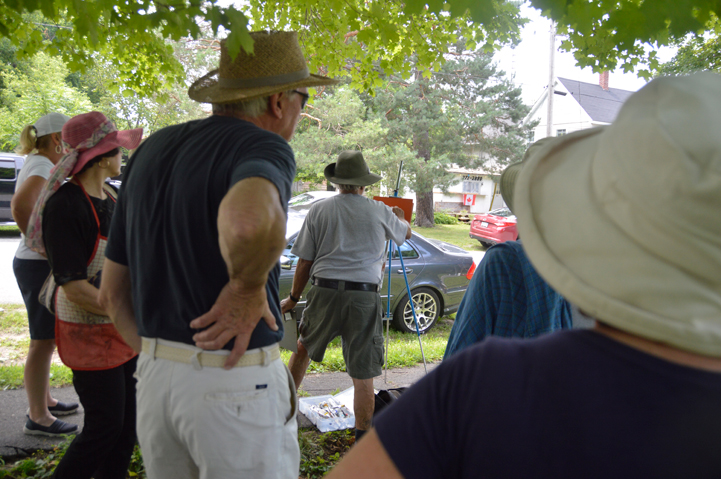
Keith Some of my art students are struggling with (at least) two things: Finding the colours in a scene where they aren't all that apparent, and loosening up their painting style. For some reason, it's not all that easy to loosen up; I said to one person, you'd think we'd been asked to bungee jump when all we're doing is just pushing paint around on a canvas. Her friend retorted, it's more like jumping without the bungee. Yet we continue to aspire to a looser rendering, not trusting the result. 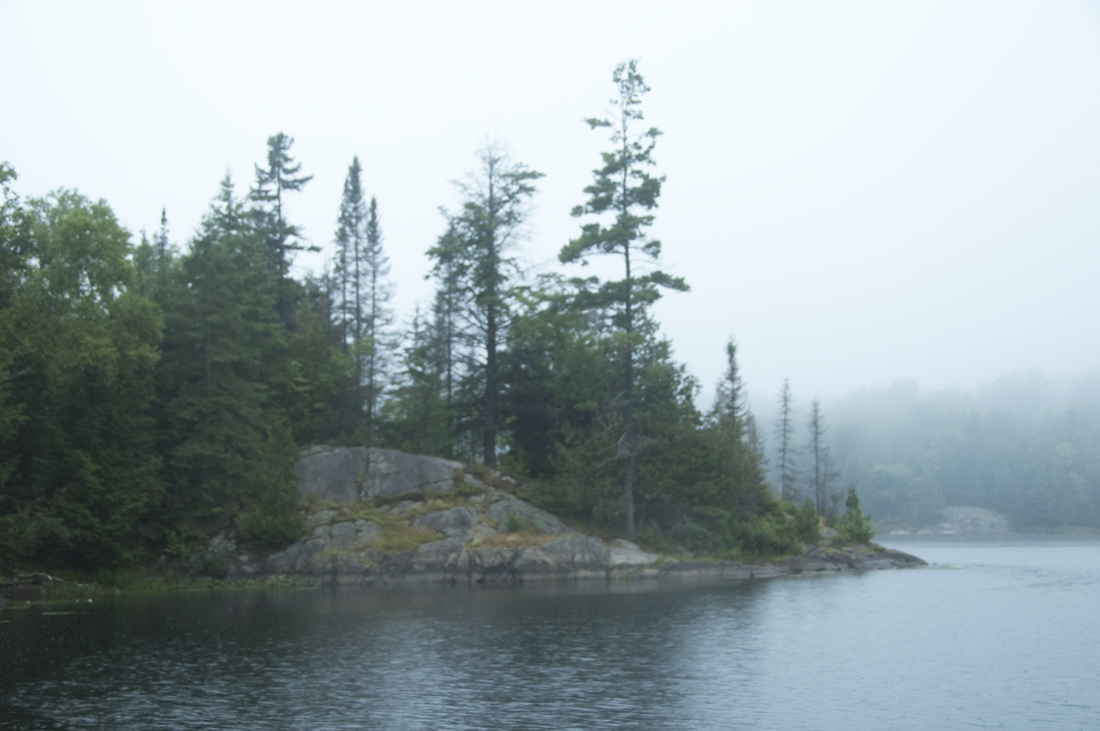 The rock and pine scene, above, faced us across the water as we set up our easels at a boat launch in Haliburton, Ontario on the first drizzly morning of A Brush With the Highlands, an annual weekend plein air festival. 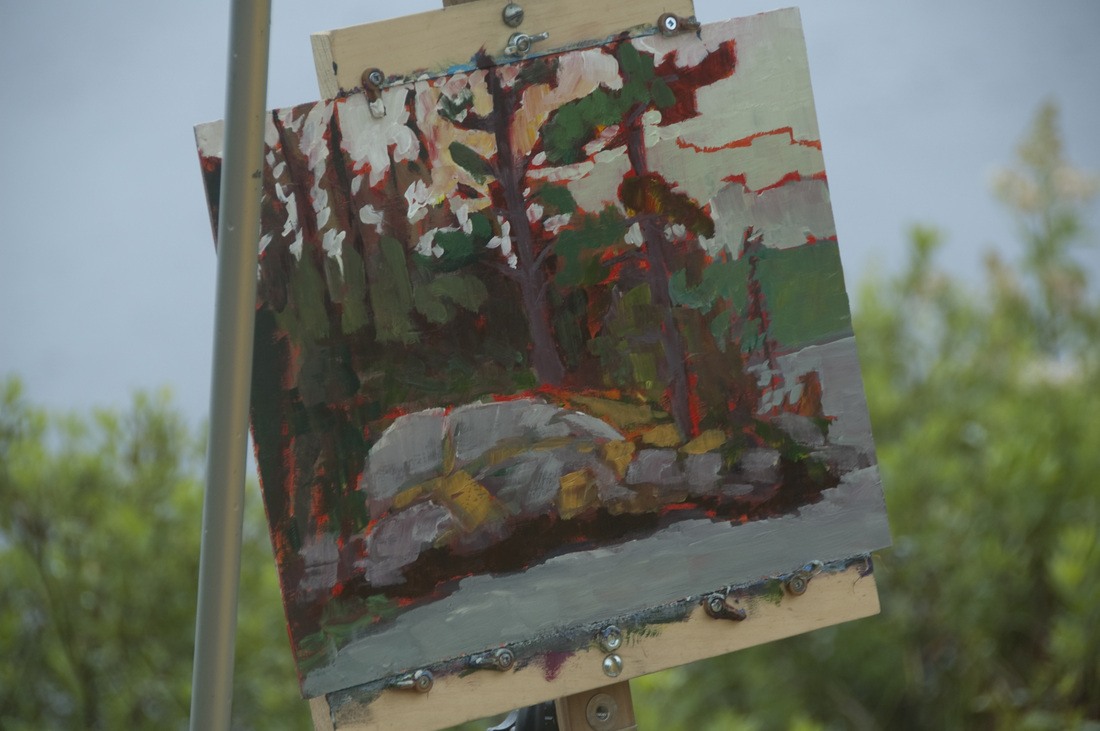 Mostly done when I took the shot, Keith's red underpainting shimmers through his shapes, giving an otherwise grey-green scene a spark of vitality and warmth, though you can still appreciate the cool, overcast elements. 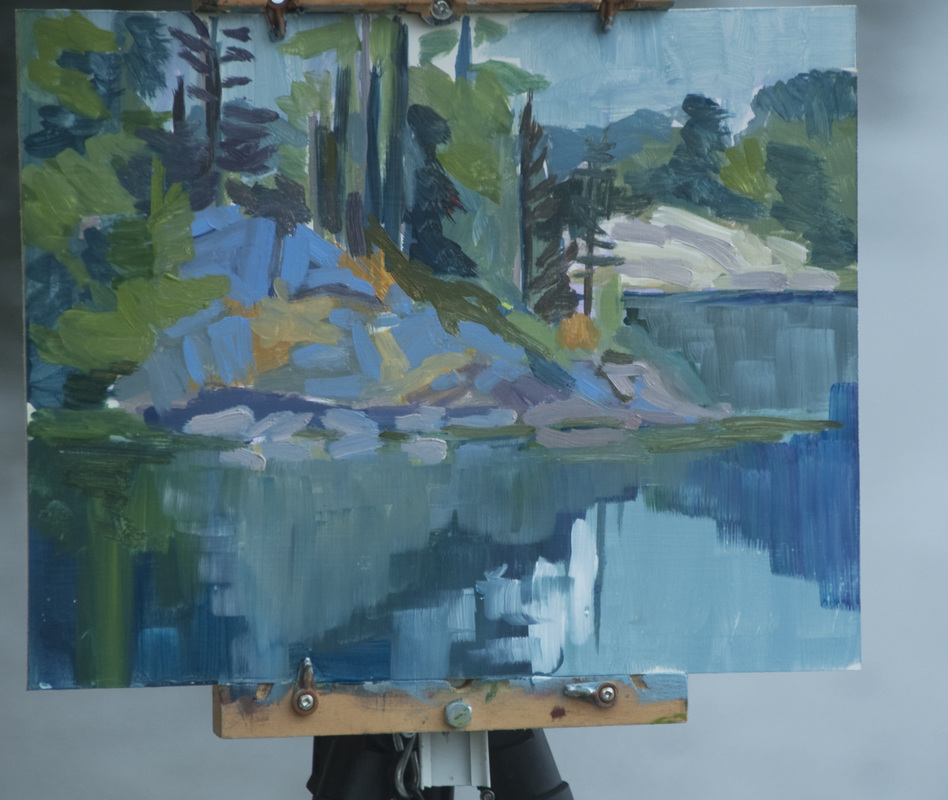 What to do? I could see that the rocks had some blue in them, so I laid down some quick blue strokes. I made the blue more intense, keeping the value correct. Working loose and fast I intensified the surrounding colours to keep in harmony with the new, more vibrant blue rocks.
To get past tightness and fussiness I find the faster I work, the better the result. However, there are times when the best plan is to walk away rather than to linger, "finishing" and "fixing". Better to say, "My work here is done" and heed the siren call of the hot chocolate at the cafe down the road. |
Keith ThirgoodIs an artist working in the Canadian, post impressionist style. I paint en plein air when I can and in the studio the rest of the time. Archives
June 2019
Categories
All
|


 RSS Feed
